Filters are used to change the appearance of an image, layer or selection in Photoshop. In the Filter Gallery, you can browse through many different types of filters, apply them individually to your image. We'll see how to create a beautiful photo frame. Mainly I'm using filters to create this frame and some layer effects like emboss...
First you should select a canvas.
Go to File ---> New
Set the following values
Leave the other fields as defaults.Now you should save the file before starting your work
Go to File ---> Save as
Then save the file as psd (default)
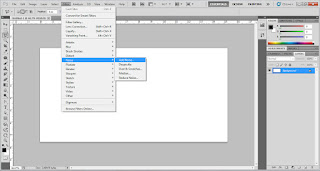
Now go to Filters --->Noise --->Add Noise.
Click on the image to Enlarge
Set the Amount around 70%. It will appear like this
Click on the image to Enlarge
Again go to Filters --->Blur --->Motion Blur
Adjust
- Angle as 0°
- Distant 214 pixels
Click on the image to Enlarge
Now you will see the dots are converted to lines. Now let's see how to design a pattern to a frame using these lines. For that we are using Liquify tool
Go to Filters --->Liquify
Wait for application to open.
A huge window will open with a lot of tools.
Press and drag the lines.
You can edit these lines by dragging them.
You can change the brush size using square buttons.
Design any pattern you wish. The output will be look like this.
Click on the image to Enlarge
Press OK
Again go to Filters --->Render--->Lighting Effects
Set the following values.
Click on the image to Enlarge
Note : Light Type(Light Style) - Directional
The output will look like this.
Then we should add a color to the canvas.
Go to Image --->Adjustments --->Hue/Saturation or Ctrl+U
Then add the following values or add your own.
Click on the image to Enlarge
Then press OK.Now go to File --->New
Set the width and height as you wish..
Then open the image you want to add the frame.
Drag and drop that image to the file you opened before.
Now it should look like this.
Click on the image to Enlarge
Now open the designed canvas again.
Select the Rectangular marquee tool
Draw a rectangle an the canvas.
Select the Move Tool and drag and drop the rectangle to the edge of the image.
Re size it until it fits the edge.
Go back to the canvas and draw another rectangle.
Add it to another edge.
Click on the image to Enlarge
Add them to all edges.
Go to Polygonal lasso tool
Select the extra pieces and delete them.
Click on the image to Enlarge
Note : Remember to select the correct layer while deleting.
Thats it!!!!!!!!!
Save it as JPG.
Final out put will be like this.
|
|
|---|
|
Respected Readers:
|
|
|
|---|


0 comments:
Post a Comment
Have a doubt?? Feel free to ask...